Tuesday, April 3, 2012
Add Thyme: Don't Passover Gefilte Fish
Add Thyme: Don't Passover Gefilte Fish: Gefilte Fish is a traditional course served during a Passover Seder. Many people are unaware of what it is and those that are familiar wi...

Thursday, March 15, 2012
Don't be Pig Headed When it Comes to Headcheese
So looking for something a little more adventurous my cooking buddy David and I thought it would be cool to sous vide a pig's head. They sell them at a local market called Duc Loi. A wonderful place where you can buy chicken feet, frozen fish balls, Italian tuna, fresh masa, organic produce and more Asian products than all the world's Whole Foods combined. And at a significant discount, although you won't be able to visit an aroma therapist or buy a pba free Paul Frank thermos for your chai decaf latte.

At DL you can get the whole beast, and that is a good thing, not only for the world but also for your taste buds. In the western world of the last 50 years or so we have been too used to eating high on the hog. But for centuries the whole beast has been not only enjoyed, but celebrated. And David & I are into celebrating old things, tasty things and modern things so we went about making our modern day head cheese. Following the guidance of @offalchris we started butchering our pig head.
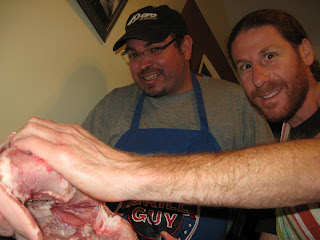
For a more graphic detail on the butchering check our chef friend from PTC Jill's documentation here. I will spare you most of the butchery, but for us it was awesome taking the meat off the bone. And there is a lot of meat on that bone/skull. After removing the meat from skull we had nearly 10 pounds of meat to season and roll. The the skull is useful as well - we roasted it then placed it in very large pot of water to get a porky stock out of it.

Once we removed the meat we concocted a flavor profile of garlic, lemons, rosemary and mint, with a spice rub that included coriander, cinnamon and dried chilies.
 Once it was seasoned we got Alabama on it. Roll and Tied..

After the meat was secured by twine we placed the 10 pound loaf in a vacuum sealed bag and let it marinate overnight. Yeah, this is a multi-day process so if you are thinking about doing it plan it out 4 days in advance before enjoying it. After its overnight marinade, it was placed into a water bath at 190 degrees F for the 24 hour cooking process.
 Once removed from the sous vide bath, it was plunged into an ice bath to stop the cooking process let the meat set up.


At DL you can get the whole beast, and that is a good thing, not only for the world but also for your taste buds. In the western world of the last 50 years or so we have been too used to eating high on the hog. But for centuries the whole beast has been not only enjoyed, but celebrated. And David & I are into celebrating old things, tasty things and modern things so we went about making our modern day head cheese. Following the guidance of @offalchris we started butchering our pig head.

For a more graphic detail on the butchering check our chef friend from PTC Jill's documentation here. I will spare you most of the butchery, but for us it was awesome taking the meat off the bone. And there is a lot of meat on that bone/skull. After removing the meat from skull we had nearly 10 pounds of meat to season and roll. The the skull is useful as well - we roasted it then placed it in very large pot of water to get a porky stock out of it.

Once we removed the meat we concocted a flavor profile of garlic, lemons, rosemary and mint, with a spice rub that included coriander, cinnamon and dried chilies.


After the meat was secured by twine we placed the 10 pound loaf in a vacuum sealed bag and let it marinate overnight. Yeah, this is a multi-day process so if you are thinking about doing it plan it out 4 days in advance before enjoying it. After its overnight marinade, it was placed into a water bath at 190 degrees F for the 24 hour cooking process.

Then back to the fridge for another overnight chill out.

The next morning it looked like this. The white part is the congealed fat, and the darker brown parts on the ends are delicious meat jelly, you want the meat jelly.

So after removing the the loaf from the bag and separating out the fat and meat jelly, I sliced into it and split it in half to reveal a beautiful marbled masterpiece of meat. The knife sliced through it like butter, amazing just amazing. Dense, rich and fatty after tasting it David & I could only say it was "F-ing Delicious!"

It makes an excellent base for a salad. Or as it is so soft and tender you can just spread it on like a meat mayonnaise on a nice piece of crusty bread with a few greens and a spicy picked pepper. Don't be afraid eating delicious things, just because they're not high on the hog. Don't be pig headed, enjoy and savor the pig head, it is F-ing delicious.
Due to the long cooking and cooling process I doubt it will ever be featured in a cooking class with Add Thyme, but when we do a sous vide class I will be sure to mention it.
Tuesday, February 7, 2012
Pastrami Smoked and Sous Vide
Looking for an excuse to use my BBQ smoker and my Sous Vide Supreme for my Super Bowl Party I thought I might give pastrami a try. Pastrami is a deli stable but rare to see it out of a deli or sub shop. And I have never had it homemade, so I was down for the challenge.
 So Pastrami is almost the same as corned beef, except pastrami gets a pepper and coriander crust and good amount of time in the smoker. And you start your pastrami as you would with a corned beef in a heavily seasoned brine. I based mine included black pepper, garlic powder, coriander seeds, mustard seeds, pink salt, whole all spice, cinnamon, cloves, onion powder, salt, bay leaf and brown sugar. I combined all the brining ingredients in water and brought to a boil then let steep and cool over night in the fridge. The next day I added my 3 pound brisket to the brine and let soak for 4 days, flipping it every day to ensure an even brine.
 After 4 days in the brine, soak the brisket in fresh cold water for at least 4 hours or overnight to balance out the salt. After the rinse pat dry the brisket and apply an even mixture of cracked black pepper and cracked coriander seeds. The brisket is now ready for the smoker.
 I used a hot smoke on my BBQ grill keeping the temp btwn 180 and 200 degrees F. Using a combo of apple wood pellets and mesquite for about 3 hours until the internal temp of the brisket reached about 135 F. After reaching that temp I removed it from the smoker.
 I had read that after smoking generally the pastrami is cooled and then steamed later just before serving. Since I had a few days before the Super Bowl party, I thought what better way to knock out a step and just put it in sous vide and finish the cooking over a period over a couple days in a moist heat without over cooking it.
 Also to keep it moist, I had read where brisket can dry even in sous vide, without a extra fat. Since I had a little pork belly fat lying around, I thought what better fat than pork fat? With its extra larded insurance I placed the pastrami into my Sous Vide Supreme water oven for 48 hours at 64 degrees Centigrade.
 Finally the day of the big game arrived and the feast was about to begin. I removed the cut the vacuum sealed bag and a waft of smoky beefy goodness filled the room. I drained the meat juices out of the bag and unfortunately I did not save it due to the craziness of guests arriving for the party and game. The pastrami was tender, moist and unbelievably delicious. I was able to sample a few pieces before the real madness started. And made a half a sandwich 5 minutes into the game, when I returned to the kitchen at halftime the entire pastrami had been devoured! And no it wasn't the only thing on the menu, I also had 2 different types of chowder, a bacon explosion, chips, guacamole, queso dip, and a kugel. I was really hoping for leftovers, to cure my Monday morning headache, but alas the only leftovers I had were the photos.


Sunday, January 29, 2012
Super Bowl Menu
So the menu is set for next week. It will be the of Battle Chowders as the creamy New England kind takes on the tomato based challenger from Manhattan. The American Classic Ro*tel Queso always has a roster spot on the menu. As does the Bacon Explosion, and in honor of the NY Slice it will be a Bacon Explosion Pizza Style. And Mini Boston Cream Pies for dessert.


Tuesday, January 17, 2012
Monday, January 9, 2012
Only 27 more cooking days left......
till the greatest of all American Feasts! The SUPER BOWL! Already eliminated Cincinnati Chili, Georgia Peach Pie, Pittsburgh all in one sandwiches and K.C. BBQ. But Texas BBQ, Mile High Green Chili, Wisconsin Brats, Maryland Crabs, Manhattan Clam and New England Clam Chowders are still in it. Unfortunately the best two food Cities are matching up this weekend as Jambalaya takes on Cioppino when the Saints and 49ers clash in San Francisco. What match up menu do you want to see on Super Bowl Sunday? My dream match up is Green Chili vs. Cioppino, all though my house might be a little tense in the days leading up to the BIG GAME!
Sunday, December 18, 2011
Thursday, December 15, 2011

Wednesday, December 14, 2011


Thursday, December 8, 2011
Fromage Fort or What to do with leftover cheese


Monday, November 28, 2011
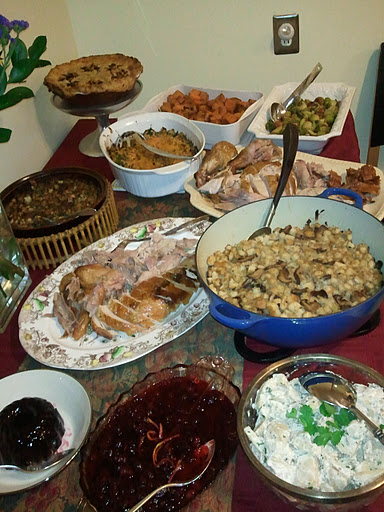
Ménage à Turkey, the Thanksgiving Three Way


Tuesday, November 22, 2011
Easy as 3,2,1 Make Gravy
3,2,1 Make gravy.
 A basic guideline for making gravy is 3 Tablespoons of flour, to 2 tablespoons of fat (butter) to 1 Cup of liquid (stock).
 Step one is to melt your fat.
 Step two is to whisk in your flour and cook for 3 minutes over medium high heat to cook out the raw flour taste. This hot fat paste is called a roux. You can cook it longer for a darker gravy. But the longer you cook it the less liquid it is able to hold, if you want a darker gravy add a tablespoon and 10 extra minutes to your roux.
 Step three is to slowly add your liquid into the roux while whisking like mad! If you don’t keep up the maniacal whisking you will have lumpy gravy, not good. Keep it smooth by whisking hard and pouring slow.
 Taste and season with salt and pepper. There your gravy is ready to enjoy. And enjoy it right away or keep on stirring until ready to enjoy.


Rubbing your Turkey or Applying the Dry Brine


Friday, November 18, 2011
Thursday, November 17, 2011
Whiskey Sugared Sweet Potatoes Sous Vide


1/2 cup brown sugar
1 teaspoon salt
pinch granulated garlic
pinch granulated onions
1/4 teaspoon cayenne
1/2 teaspoon ground allspice
1/2 teaspoon cinnamon
1/4 cup American whiskey
4 tablespoons butter
1 tablespoon cider vinegar


Subscribe to:
Posts (Atom)